react-babylonjs
'react-babylonjs' 将Babylon.js实时3D引擎与React集成
react-babylonjs让您能够使用熟悉的声明式语法构建场景和组件,同时享受可重用组件和钩子的优势。得益于代码生成,Babylon.js API的大部分内容都可以通过声明式方式覆盖,甚至自定义属性也允许您声明式地添加阴影、物理效果、3D模型,将2D/3D UI附加到网格上等。
完全支持钩子。对TypeScript提供全面支持,包括元素的自动完成和编译时检查。上下文API和钩子提供了对Scene/Engine/Canvas的便捷访问。
如何安装
$ npm i react-babylonjs @babylonjs/core @babylonjs/gui
或者
$ yarn add react-babylonjs @babylonjs/core @babylonjs/gui
除了React和babylon.js外没有其他第三方依赖
Babylon.js 4.x
Babylon.js 4.x目前与@latest版本不兼容(请遵循对等依赖警告)。与4.x和5.x都兼容的最后一个版本是3.0.31。
# 仅适用于Babylonjs.4.x
$ yarn add react-babylonjs@3.0.31
模型
如果您使用3D模型,请确保已添加@babylonjs/loaders NPM包。它不是直接依赖项,但通过具有副作用的导入注册加载器作为插件:
- 注册所有模型类型
import @babylonjs/loaders; - OBJ
import '@babylonjs/loaders/OBJ'; - glTF
import '@babylonjs/loaders/glTF';
(在这里可以找到更多关于ES6中模型加载的说明)
使用风格
react-babylonjs试图保持对如何将BabylonJS与React集成的方式不持固定意见。该模块提供了100%声明式的选项,并且/或者您可以通过添加代码进行自定义。有许多逃生舱,您可以在其中切换到命令式编码和直接访问对象。
连接各个部分
如果您是React或babylon.js的新手(或两者都是),前面还有一些学习要做。babylon.js文档网站对于理解照明、摄像机等基础知识非常有用。本项目旨在使这些内容易于使用JSX集成到React中。
这里我们重用了一个可以点击或悬停的SpinningBox组件。这些可重用组件可以用来组成一个声明式场景。我们使用钩子来处理点击、悬停和旋转。

import React, { useRef, useState } from 'react'
import {
  Engine,
  Scene,
  useBeforeRender,
  useClick,
  useHover,
} from 'react-babylonjs'
import { Vector3, Color3 } from '@babylonjs/core'

const DefaultScale = new Vector3(1, 1, 1)
const BiggerScale = new Vector3(1.25, 1.25, 1.25)

const SpinningBox = (props) => {
  // 使用与常规DOM元素相同的React钩子访问Babylon场景对象
  const boxRef = useRef(null)

  const [clicked, setClicked] = useState(false)
  useClick(() => setClicked((clicked) => !clicked), boxRef)

  const [hovered, setHovered] = useState(false)
  useHover(
    () => setHovered(true),
    () => setHovered(false),
    boxRef
  )

  // 这将在每个Babylon帧上旋转盒子。
  const rpm = 5
  useBeforeRender((scene) => {
    if (boxRef.current) {
      // Delta时间使动画更平滑。
      var deltaTimeInMillis = scene.getEngine().getDeltaTime()
      boxRef.current.rotation.y +=
        (rpm / 60) * Math.PI * 2 * (deltaTimeInMillis / 1000)
    }
  })

  return (
    <box
      name={props.name}
      ref={boxRef}
      size={2}
      position={props.position}
      scaling={clicked ? BiggerScale : DefaultScale}
    >
      <standardMaterial
        name={`${props.name}-mat`}
        diffuseColor={hovered ? props.hoveredColor : props.color}
        specularColor={Color3.Black()}
      />
    </box>
  )
}
export const SceneWithSpinningBoxes = () => (
钩子、阴影和物理(以及可选的 TypeScript)
你可以声明式地使用许多功能 - 这里只有按钮点击处理程序实际上有任何代码 - 我们有声明式的物理、GUI、光照和阴影。演示: 弹跳演示
import React, { useRef } from 'react';
// 完整代码见 https://github.com/brianzinn/create-react-app-typescript-babylonjs

const App: React.FC = () => {
  let sphereRef = useRef<Nullable<Mesh>>();

  const onButtonClicked = () => {
    if (sphereRef.current) {
      sphereRef.current.physicsImpostor!.applyImpulse(
        Vector3.Up().scale(10),
        sphereRef.current.getAbsolutePosition()
      );
    }
  };

  return (
    <Engine antialias={true} adaptToDeviceRatio={true} canvasId="sample-canvas">
      <Scene enablePhysics={[gravityVector, new CannonJSPlugin()]}>
        <arcRotateCamera name="arc" target={ new Vector3(0, 1, 0) }
          alpha={-Math.PI / 2} beta={(0.5 + (Math.PI / 4))}
          radius={4} minZ={0.001} wheelPrecision={50}
          lowerRadiusLimit={8} upperRadiusLimit={20} upperBetaLimit={Math.PI / 2}
        />
        <hemisphericLight name='hemi' direction={new Vector3(0, -1, 0)} intensity={0.8} />
        <directionalLight name="shadow-light" setDirectionToTarget={[Vector3.Zero()]} direction={Vector3.Zero()} position = {new Vector3(-40, 30, -40)}
          intensity={0.4} shadowMinZ={1} shadowMaxZ={2500}>
          <shadowGenerator mapSize={1024} useBlurExponentialShadowMap={true} blurKernel={32}
            shadowCasters={["sphere1", "dialog"]} forceBackFacesOnly={true} depthScale={100}
          />
        </directionalLight>
        <sphere ref={sphereRef} name="sphere1" diameter={2} segments={16} position={new Vector3(0, 2.5, 0)}>
          <physicsImpostor type={PhysicsImpostor.SphereImpostor} _options={{
              mass: 1,
              restitution: 0.9
          }} />
          <plane name="dialog" size={2} position={new Vector3(0, 1.5, 0)}>
            <advancedDynamicTexture name="dialogTexture" height={1024} width={1024} createForParentMesh={true} hasAlpha={true}>
              <rectangle name="rect-1" height={0.5} width={1} thickness={12} cornerRadius={12}>
                  <rectangle>
                    <babylon-button name="close-icon" background="green" onPointerDownObservable={onButtonClicked}>
                      <textBlock text={'\uf00d click me'} fontFamily="FontAwesome" fontStyle="bold" fontSize={200} color="white" />
                    </babylon-button>
                  </rectangle>
              </rectangle>
            </advancedDynamicTexture>
          </plane>
        </sphere>

        <ground name="ground1" width={10} height={10} subdivisions={2} receiveShadows={true}>
          <physicsImpostor type={PhysicsImpostor.BoxImpostor} _options={{
              mass: 0,
              restitution: 0.9
          }} />
        </ground>
        <vrExperienceHelper webVROptions={{ createDeviceOrientationCamera: false }} enableInteractions={true} />
      </Scene>
    </Engine>
  );
}
React Native
对于原生应用没有在线示例,但你可以使用 EngineCanvasContext.Provider 进行集成:
import React, { useState } from 'react';
import { View } from 'react-native';

import { EngineView, useEngine } from '@babylonjs/react-native';
import { Camera } from '@babylonjs/core';
import { EngineCanvasContext, Scene } from 'react-babylonjs';

const EngineScreen: FunctionComponent<ViewProps> = (props: ViewProps) => {

  const engine = useEngine();
  const [camera, setCamera] = useState<Camera>();

  return (
    <View style={props.style}>
      <EngineCanvasContext.Provider value={{ engine, canvas: null }}>
        {engine &&
          <Scene>
            <arcRotateCamera
              name="camera1"
              onCreated={camera => setCamera(camera)}
            />
            <hemisphericLight name="light1" />
            { /* 这里是其余的声明式场景/组件 */ }
          </Scene>
        }
      </EngineCanvasContext.Provider>
      <EngineView camera={camera} displayFrameRate={true} />
    </View>
  );
};
开发者体验和快速刷新
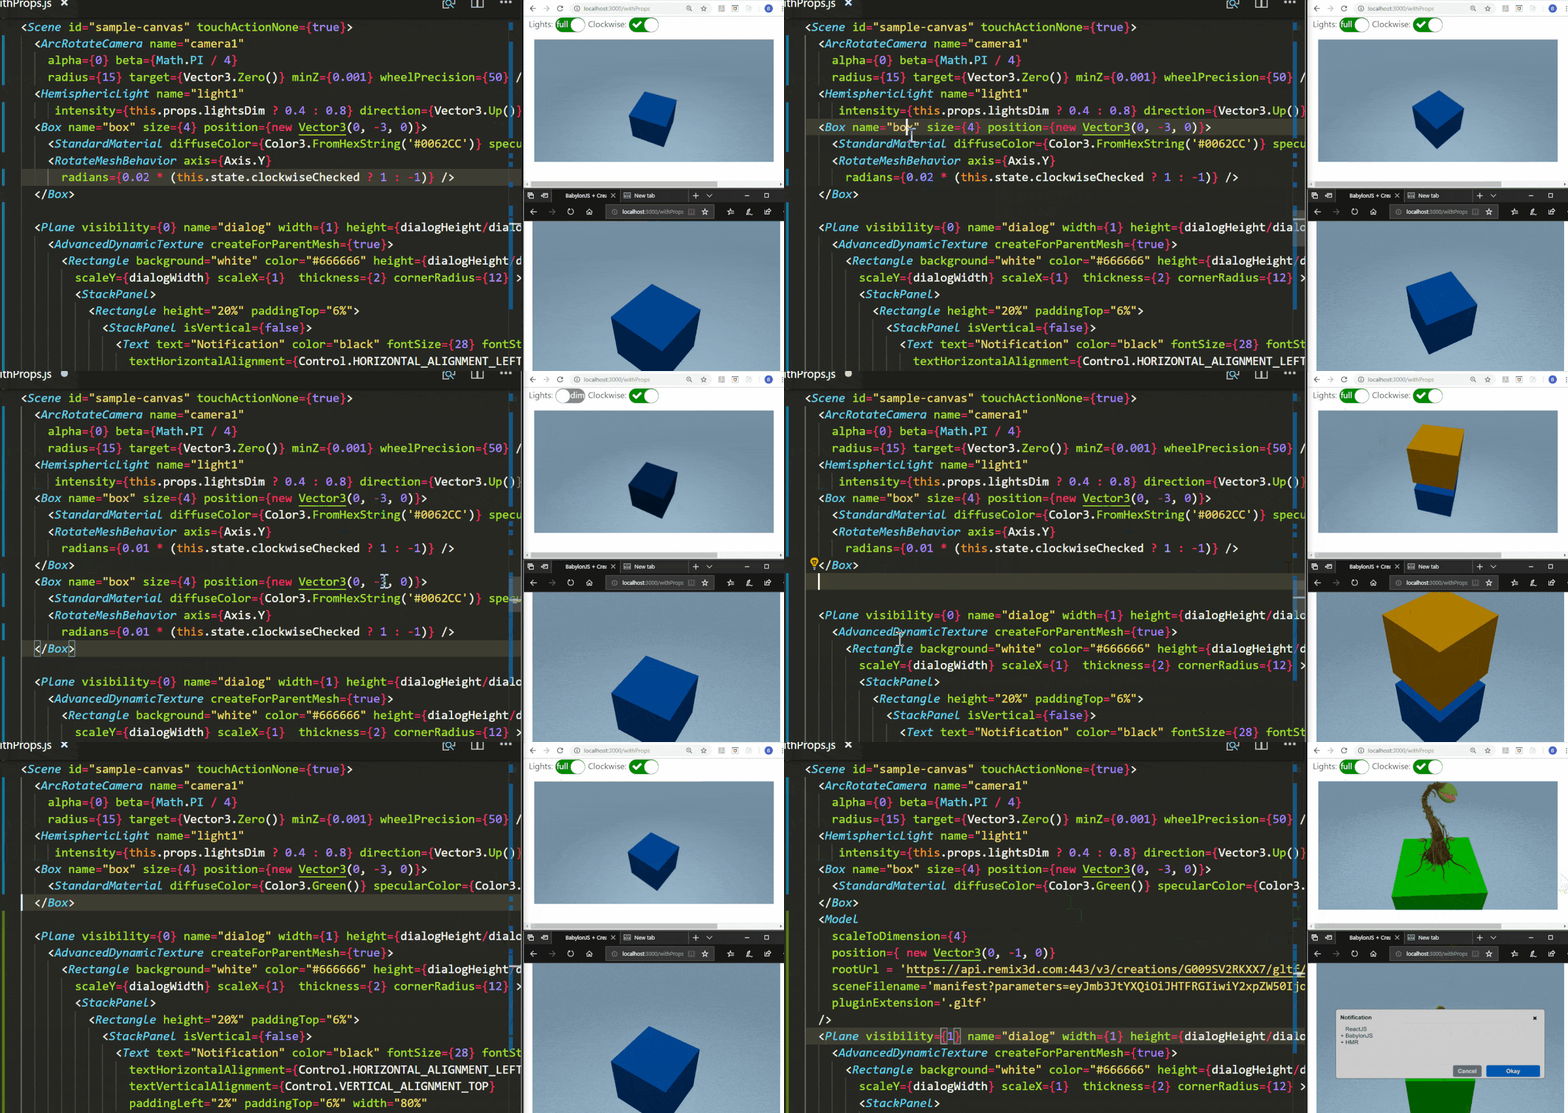
通过声明式(TSX/JSX)编码和快速刷新,您可以在3D环境中体验相同的开发工作流程 - 即:在编辑器中保存更改,并立即在浏览器中看到效果。请注意,在此捕获中,当灯光变暗时,即使在代码更新和场景刷新之后,状态更改仍然保持不变。

API
本项目使用代码生成,这允许快速协调和出色的类型支持。
发布历史和变更
Storybook
在GitHub Pages上有约50个带有可查看源代码的网页示例。
示例项目
- Create React App(JavaScript) CRA JavaScript实现。GitHub页面上有典型用法和声明式用法的实时示例,部分使用了Redux。
- Create React App(TypeScript) CRA 3 TypeScript。包含物理、阴影等示例。
贡献者
- 非常感谢Konsumer帮助将这个项目提升到了一个新的水平。issue #6中的想法和代码沙箱启发了代码生成和HOC + Context API集成。
- seacloud9添加了storybook、GSAP演示、动态地形(扩展)和PIXI演示。
- hookex做出了最大的贡献 :) 包括适当的纹理处理演示、节点父子关系演示、全屏GUI演示、效果层发光演示、行为演示、useHover和useClick钩子演示以及react-spring集成演示。
react-babylon-spring的作者 - https://github.com/hookex/react-babylon-spring。 - dennemark添加了对
CascadedShadowGenerator、createPortal和Html(在场景中投影HTML - 从drei移植)的支持。还有Snippet Material和"tunnel" zustand集成的故事。添加了RenderOnDemand来自定义渲染循环。 - kencyke创建了一个很酷的多画布+云点仓库,启发了创建`<pointsCloudSystem .../>作为宿主元素。
- flostellbrink修复了
react-babylon-spring集成,并为Storybook添加了GH操作(github pages) - voronp添加了
isPaused引擎属性以跳过渲染 - saidmoya12添加了相机渲染前/后钩子
同时感谢所有通过问题/问题/讨论做出贡献的人。所有伟大的想法和请求都是这个项目发展超越实验的原因。
用♥制作

 访问官网
访问官网 Github
 文档
文档


