GeoDream: 解耦2D和几何先验,实现高保真度和一致性的3D生成
马宝瑞1*,邓浩歌2,1*,周俊生3,1,刘云生3,黄铁军1,4,王鑫龙1
1北京智源人工智能研究院,2北京邮电大学,3清华大学,4北京大学
* 共同第一作者
论文 | 项目主页
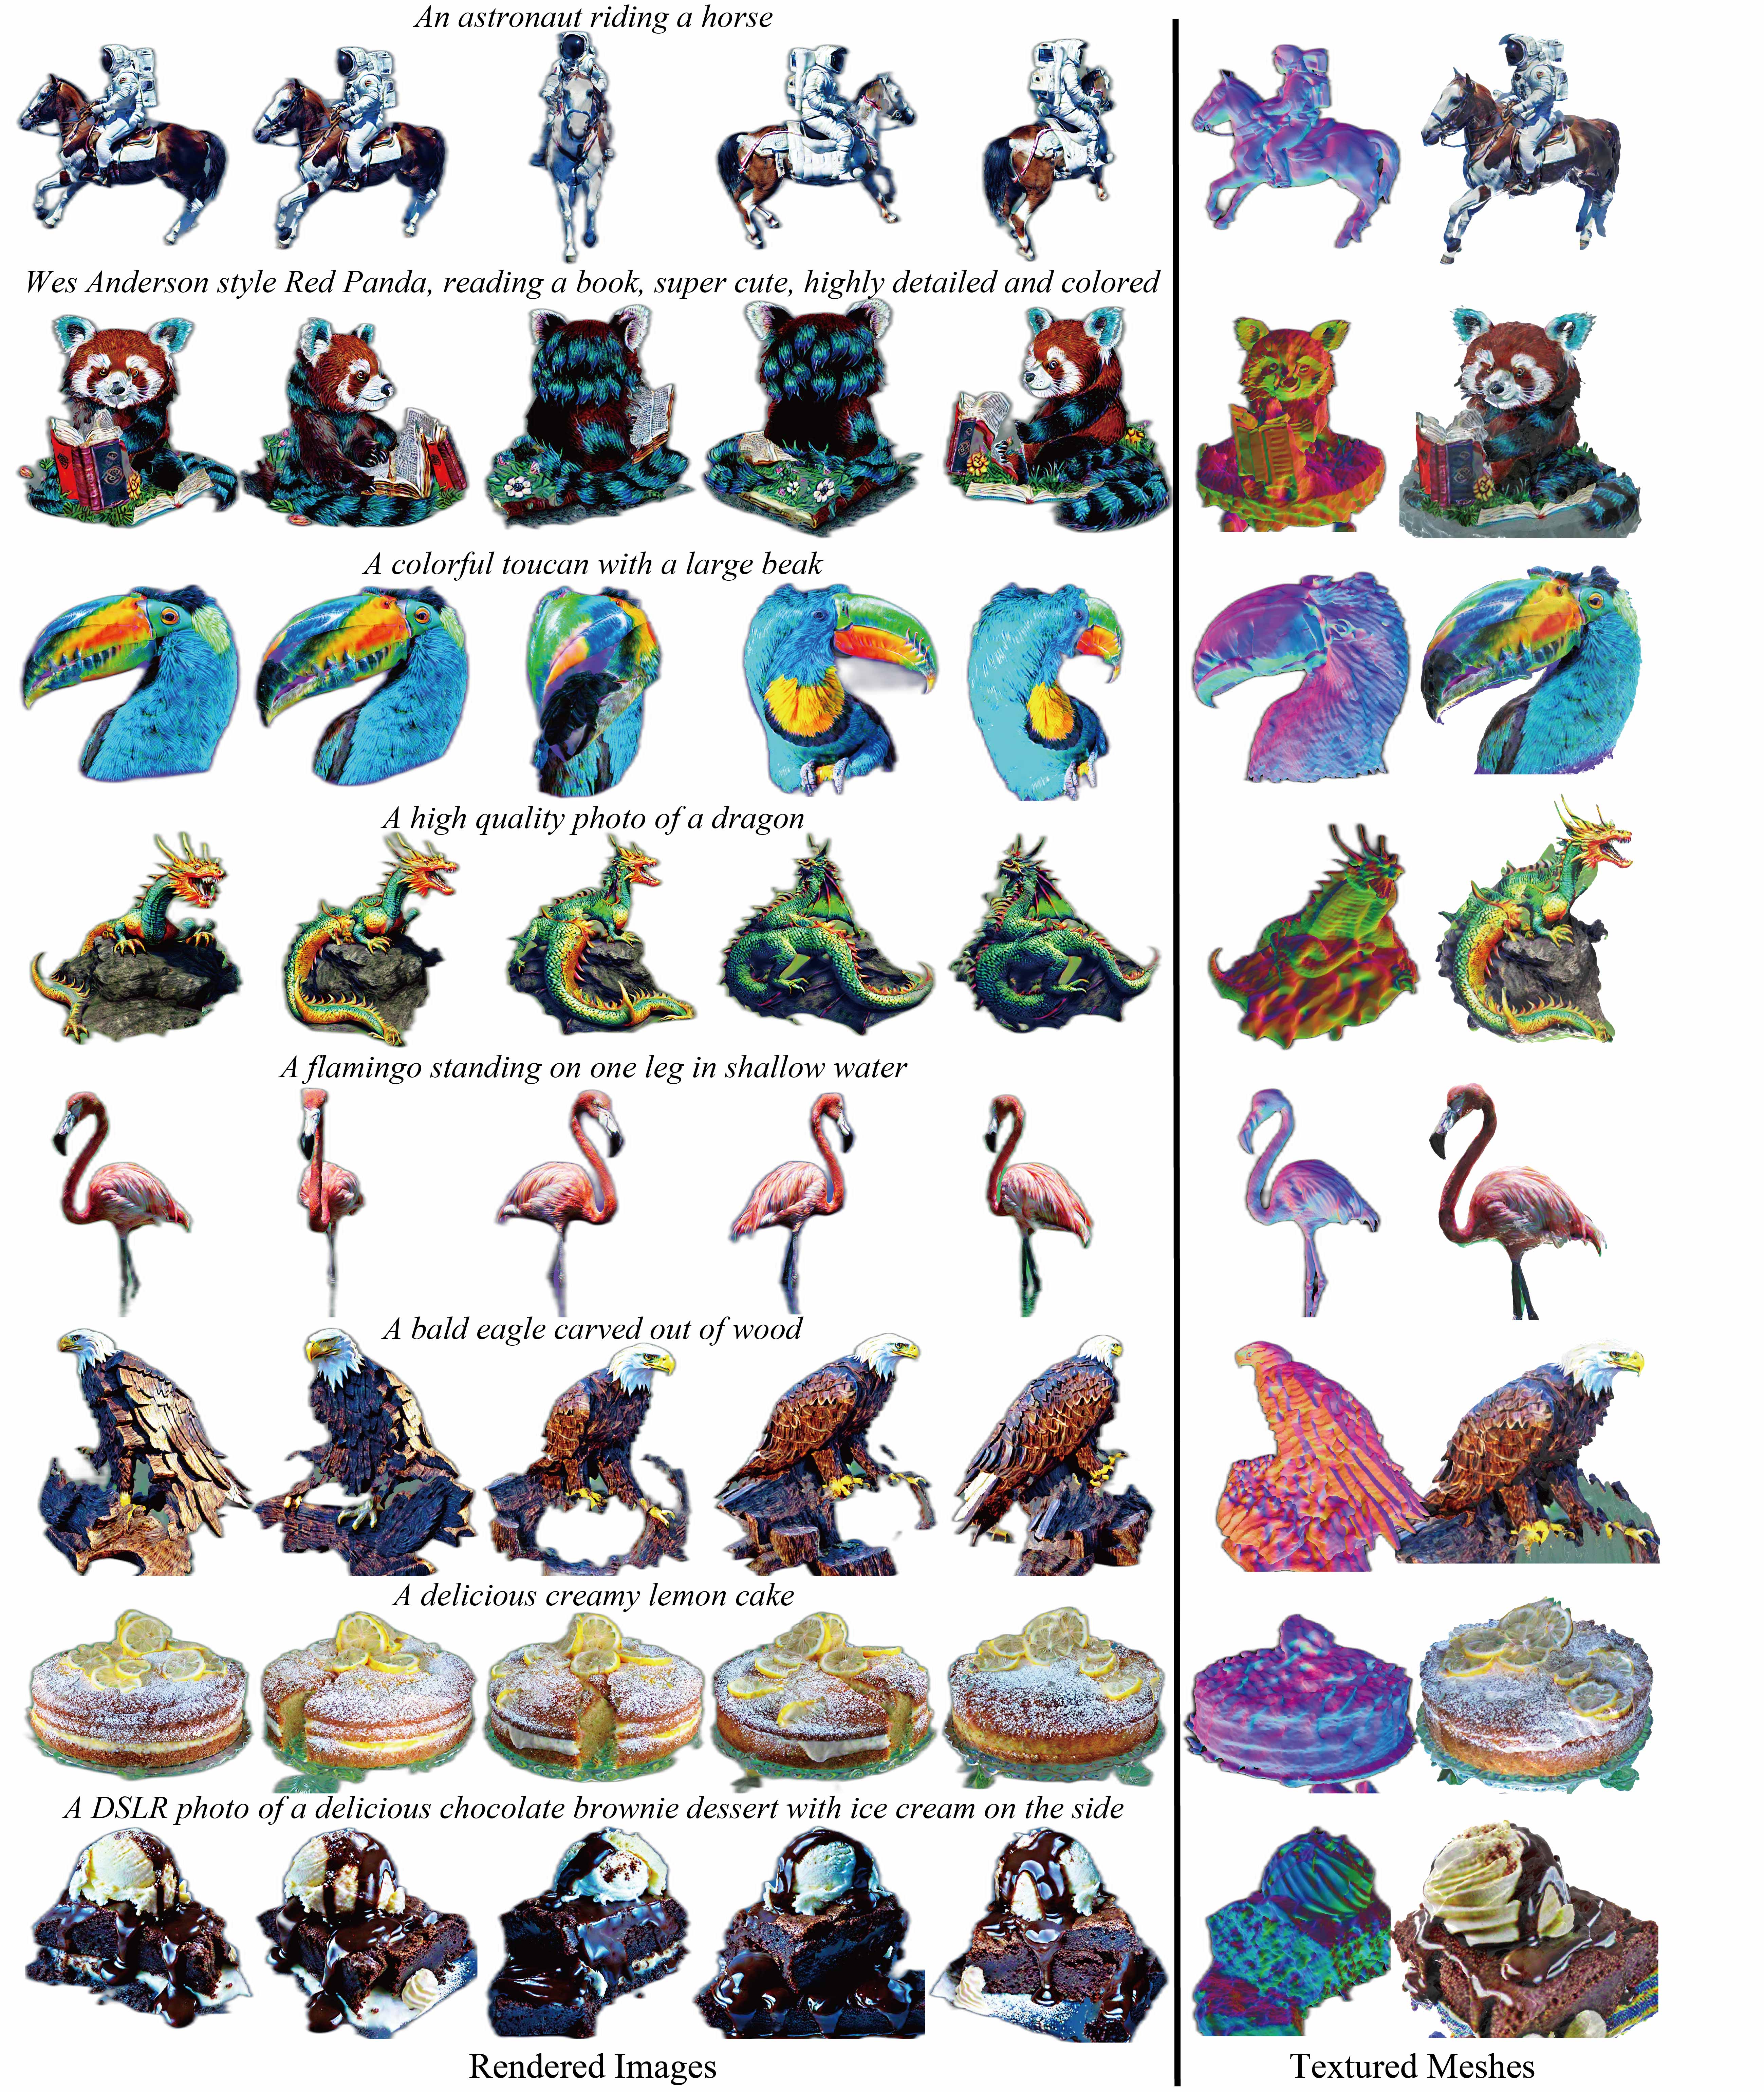
我们提出了GeoDream,这是一种将显式广义3D先验与2D扩散先验相结合的3D生成方法,以增强获得明确的3D一致几何结构的能力,同时不牺牲多样性或保真度。 我们的数值和视觉比较表明,GeoDream生成的3D一致纹理网格具有更高分辨率的真实渲染效果(即1024 × 1024),并且在语义连贯性方面表现更好。 据我们所知,为了全面评估语义连贯性,我们首次提出了Uni3D-score度量,将测量从2D提升到3D。您可以在下面找到GeoDream训练和3D度量Uni3D-score评估代码的详细使用说明。

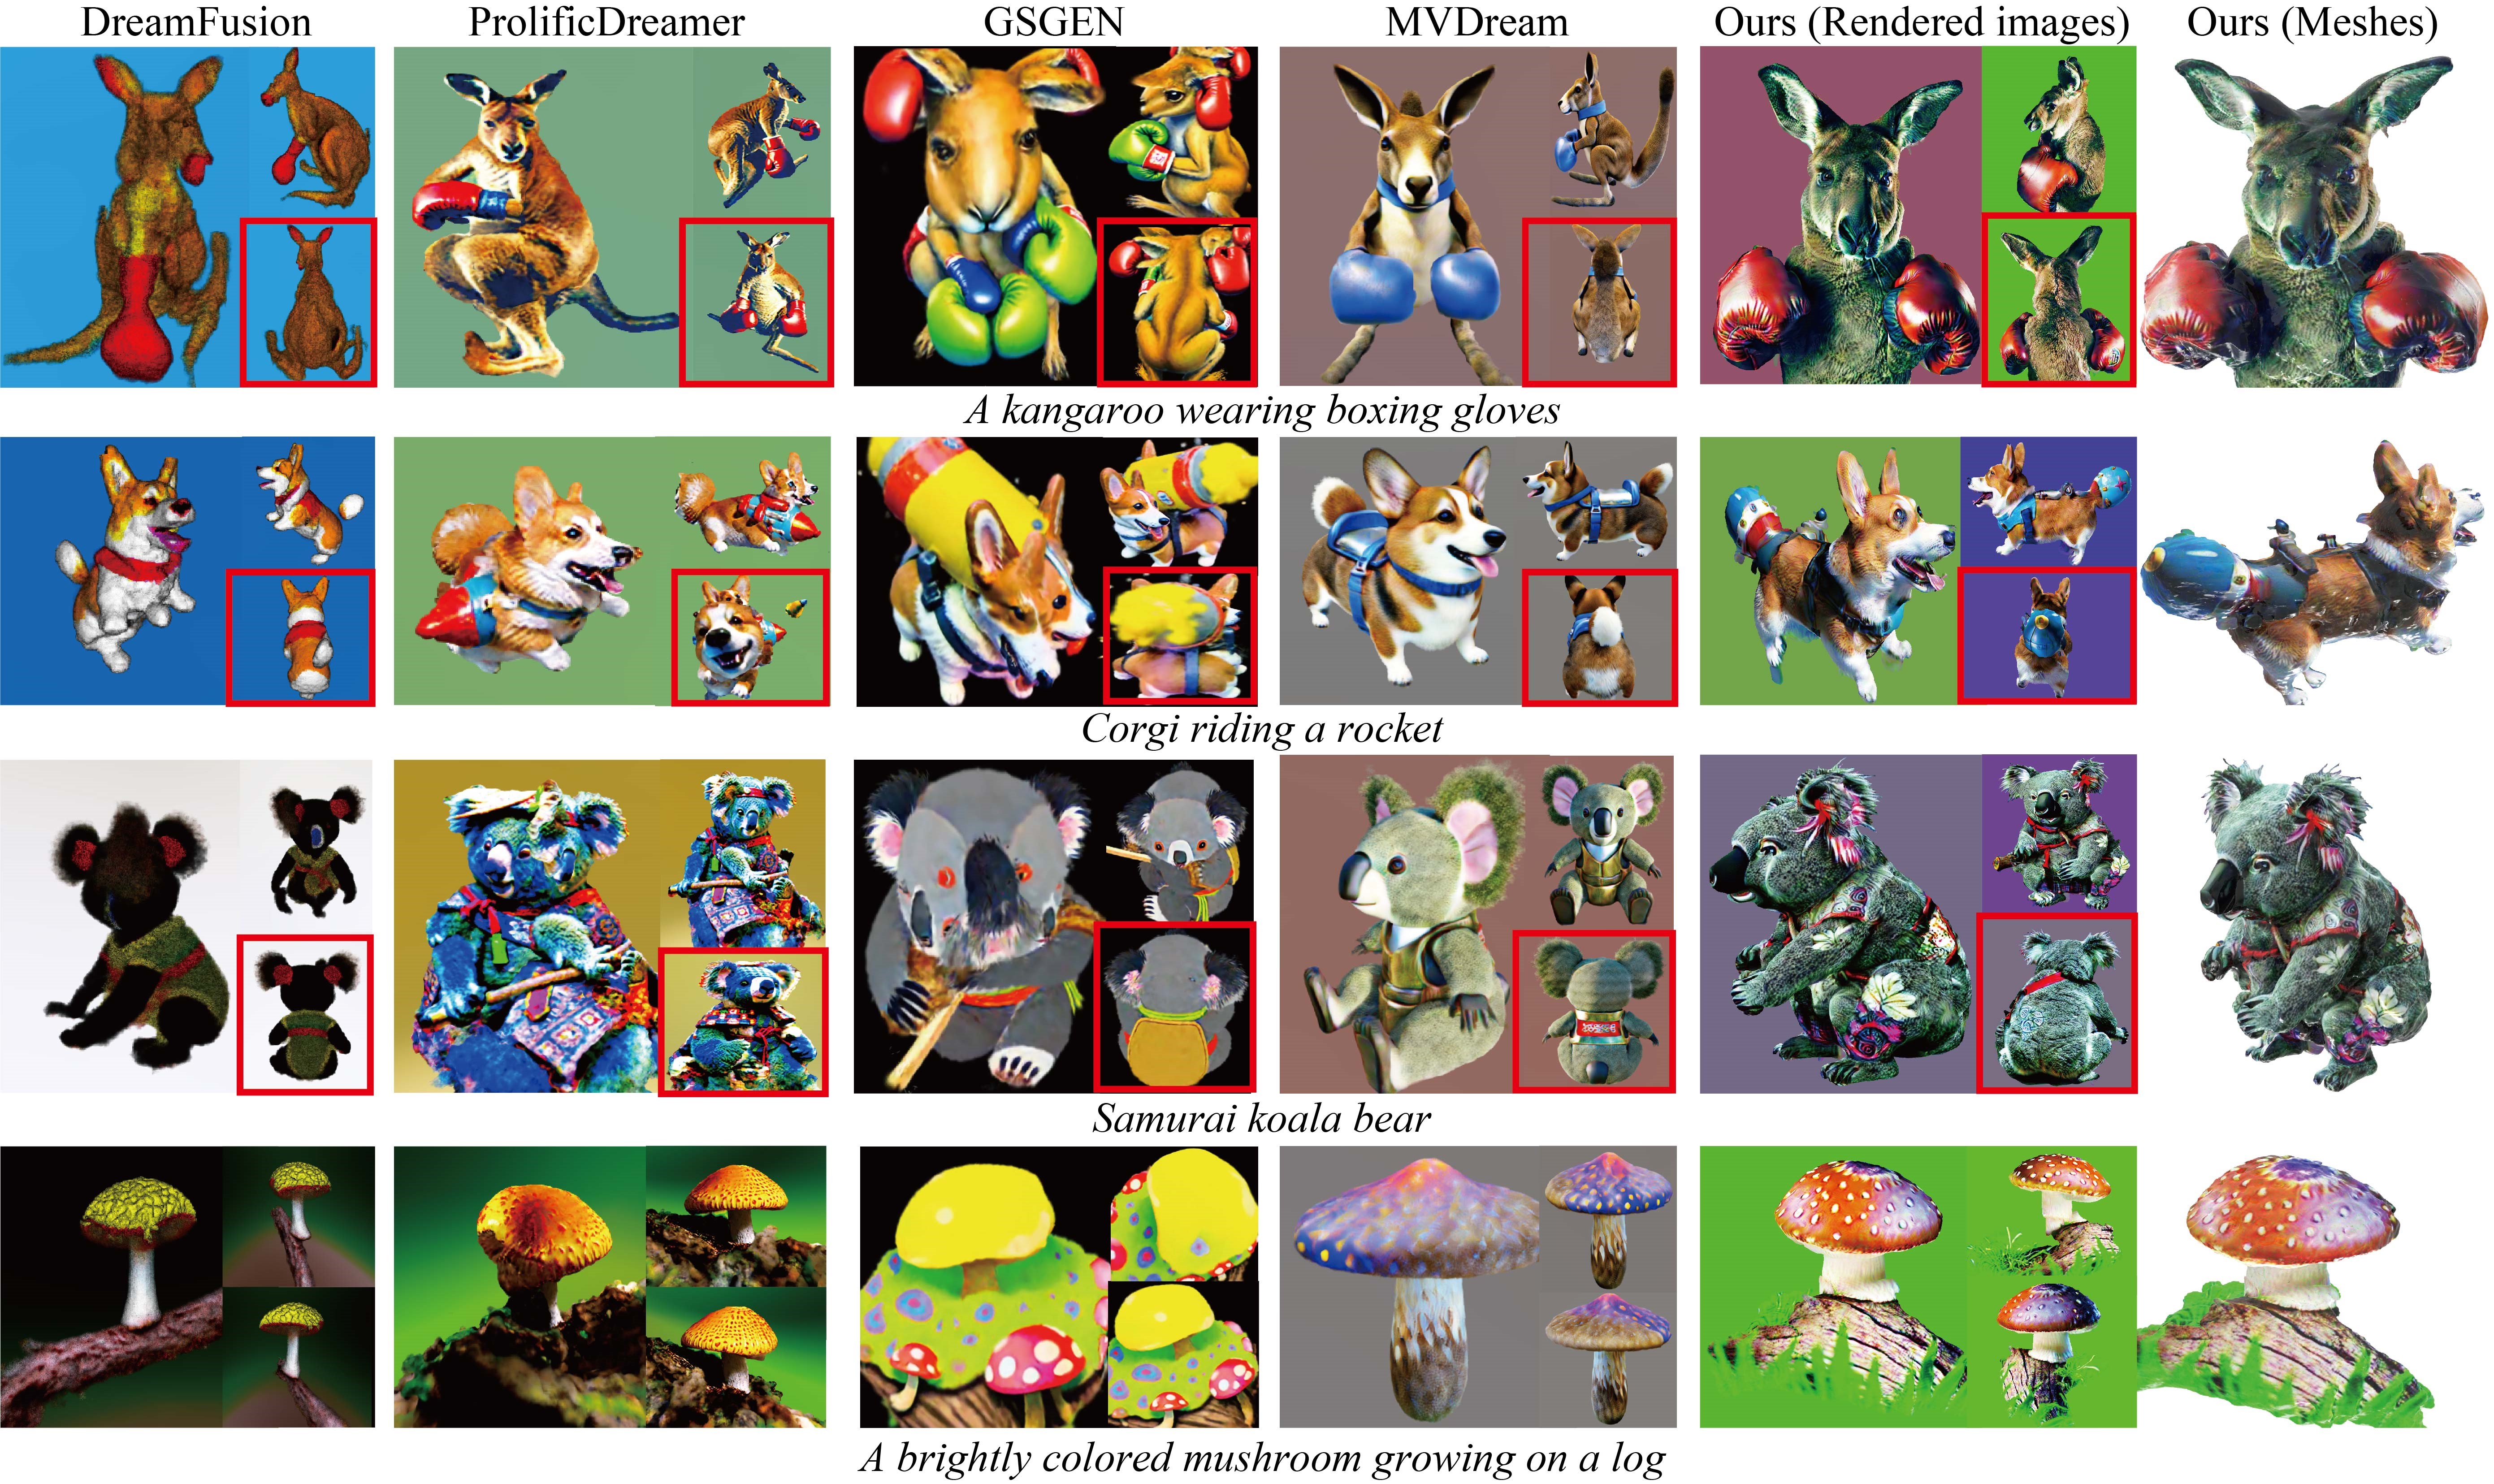
GeoDream通过将显式3D先验与2D扩散先验相结合来缓解双面问题。GeoDream生成一致的多视角渲染图像和丰富细节的纹理网格。
 与基线方法的定性比较。后视图用红色矩形突出显示,以清晰观察多个面。
新闻
[2024年1月5日] 为GeoDream添加了ThreeStudio扩展支持。扩展实现可以在threestudio分支找到。
[2023年12月20日] 添加了对Stable-Zero123的支持。按照这里的说明尝试使用。
[2023年12月2日] 代码发布。
安装
git clone https://github.com/baaivision/GeoDream.git
cd GeoDream
由于预训练的多视图扩散用于预测源视图和构建代价体积的代码之间存在环境冲突,我们目前不得不使用两个独立的虚拟环境。这对研究人员来说很不方便,我们正在努力解决这些冲突,作为未来更新计划的一部分。
安装用于预测源视图的环境
有关安装的其他信息,请参见mv-diffusion/README.md。
安装用于构建代价体积的环境
有关其他信息(包括通过Docker安装),请参见installation.md。
以下步骤已在Ubuntu20.04上进行了测试。
- 您必须拥有至少24GB VRAM的NVIDIA显卡,并安装了CUDA。
- 安装
Python >= 3.8。 - (可选,推荐)创建虚拟环境:
python3 -m virtualenv venv
. venv/bin/activate

# 较新版本的pip(如pip-23.x)可能比旧版本(如pip-20.x)快得多。
# 例如,它会缓存git包的轮子,以避免以后不必要的重新构建。
python3 -m pip install --upgrade pip
- 安装
PyTorch >= 1.12。我们已在torch1.12.1+cu113和torch2.0.0+cu118上进行了测试,但其他版本也应该可以正常工作。
# torch1.12.1+cu113
pip install torch==1.12.1+cu113 torchvision==0.13.1+cu113 --extra-index-url https://download.pytorch.org/whl/cu113
# 或 torch2.0.0+cu118
pip install torch torchvision --index-url https://download.pytorch.org/whl/cu118
- (可选,推荐)安装ninja以加速CUDA扩展的编译:
pip install ninja
- 安装依赖项:
pip install -r requirements.txt
pip install inplace_abn
FORCE_CUDA=1 pip install --no-cache-dir git+https://github.com/mit-han-lab/torchsparse.git@v1.4.0
如果您在连接Hugging Face时遇到不稳定的情况,我们建议您:(1) 在第一次运行获取所有需要的文件后,在运行命令之前设置环境变量TRANSFORMERS_OFFLINE=1 DIFFUSERS_OFFLINE=1 HF_HUB_OFFLINE=1,以避免每次运行时都连接到Hugging Face,或者 (2) 按照这里和这里的说明将您使用的指导模型下载到本地文件夹,并在configs/geodream-neus.yaml、configs/geodream-dmtet-geometry.yaml和configs/geodream-dmtet-texture.yaml中将pretrained_model_name_or_path和pretrained_model_name_or_path_lora设置为本地路径。
快速开始
3D生成需要以下两个步骤。
- 预测源视图并构建代价体积(从以下两种方式中选择一种)
- GeoDream训练
预测源视图并构建代价体积
从两种方式中选择一种。
通过给定的参考视图和提示驱动预测源视图并构建代价体积
conda activate geodream_mv
cd ./mv-diffusion
sh run-volume-by-zero123.sh "An astronaut riding a horse" "ref_imges/demo.png"
# 默认使用Zero123。如果生成的结果不令人满意,可以考虑使用Stable Zero123。
sh run-volume-by-sd-zero123.sh "An astronaut riding a horse" "ref_imges/demo.png"
conda deactivate
cd ..
通过给定的提示驱动预测源视图并构建代价体积
conda activate geodream_mv
cd ./mv-diffusion
sh step1-run-mv.sh "An astronaut riding a horse"
conda deactivate
. venv/bin/activate
sh step2-run-volume.sh "An astronaut riding a horse"
cd ..
GeoDream训练
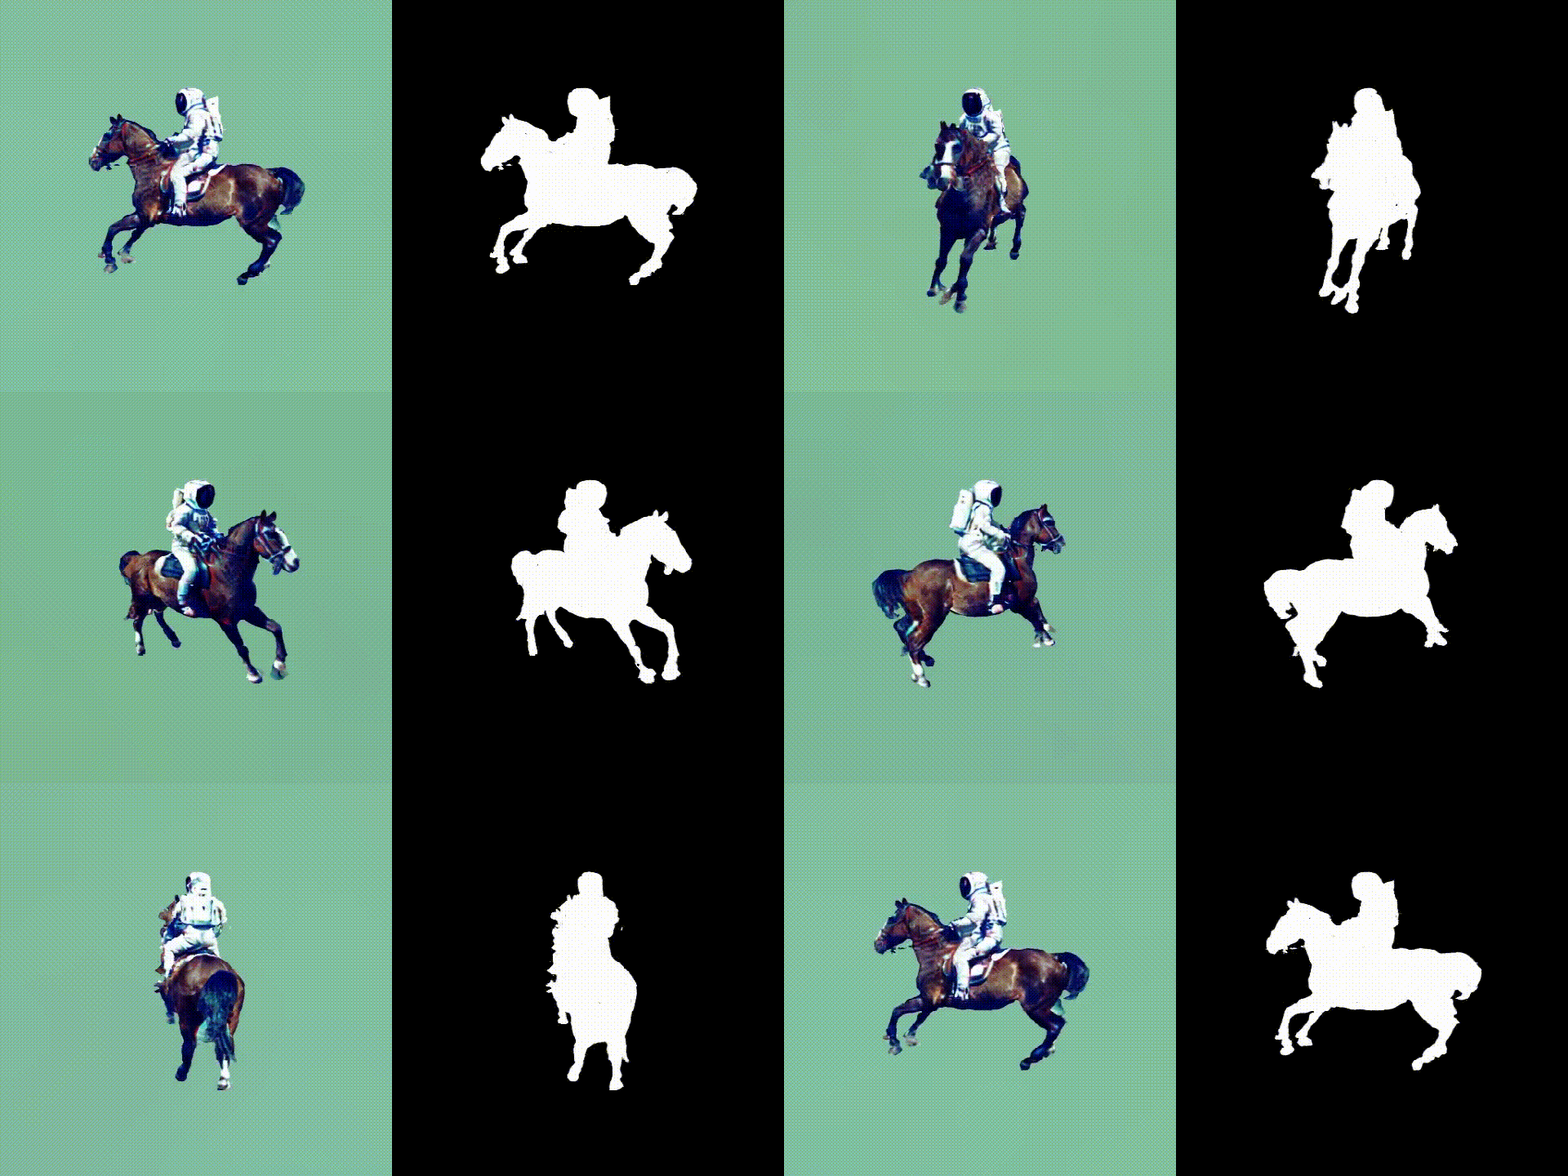
第一阶段获得的渲染图像

第二+三阶段获得的渲染图像

注意:我们压缩了这些动图以加快预览速度。
conda deactivate
. venv/bin/activate
# --------- 第一阶段 (NeuS) --------- #
# 使用512x512 NeuS渲染进行物体生成,~25GB VRAM
python launch.py --config configs/geodream-neus.yaml --train --gpu 0 system.prompt_processor.prompt="an astronaut riding a horse" system.geometry.init_volume_path="mv-diffusion/volume/An_astronaut_riding_a_horse/con_volume_lod_150.pth"
# 如果您没有足够的VRAM,可以尝试使用64x64 NeuS渲染进行训练,~15GB VRAM
python launch.py --config configs/geodream-neus.yaml --train --gpu 0 system.prompt_processor.prompt="an astronaut riding a horse" system.geometry.init_volume_path="data/con_volume_lod_150.pth" data.width=64 data.height=64
# 对预训练和LoRA使用相同的模型可以使用<10GB VRAM进行64x64训练
# 但由于使用了epsilon预测模型进行LoRA训练,质量会较差
python launch.py --config configs/geodream-neus.yaml --train --gpu 0 system.prompt_processor.prompt="an astronaut riding a horse" system.geometry.init_volume_path="data/con_volume_lod_150.pth" data.width=64 data.height=64 system.guidance.pretrained_model_name_or_path_lora="stabilityai/stable-diffusion-2-1-base"

# --------- 第二阶段 (DMTet几何细化) --------- #
# 细化几何
python launch.py --config configs/geodream-dmtet-geometry.yaml --train system.geometry_convert_from=path/to/stage1/trial/dir/ckpts/last.ckpt --gpu 0 system.prompt_processor.prompt="an astronaut riding a horse" system.renderer.context_type=cuda system.geometry_convert_override.isosurface_threshold=0.0
# --------- 第3阶段(DMTet纹理化) --------- #
# 使用1024x1024分辨率光栅化、Stable Diffusion VSD引导进行纹理化,需要约20GB显存
python launch.py --config configs/geodream-dmtet-texture.yaml system.geometry.isosurface_resolution=256 --train data.batch_size=2 system.renderer.context_type=cuda --gpu 0 system.geometry_convert_from=path/to/stage2/trial/dir/ckpts/last.ckpt system.prompt_processor.prompt="一名宇航员骑马"
# 如果显存不足,可以尝试使用batch_size=1训练,需要约10GB显存
python launch.py --config configs/geodream-dmtet-texture.yaml system.geometry.isosurface_resolution=256 --train data.batch_size=1 system.renderer.context_type=cuda --gpu 0 system.geometry_convert_from=path/to/stage2/trial/dir/ckpts/last.ckpt system.prompt_processor.prompt="一名宇航员骑马"
我们还为研究人员提供了相应的脚本以供参考:neus-train.sh对应第1阶段,mesh-finetuning-geo.sh和mesh-finetuning-texture.sh分别对应第2和第3阶段。
从检查点恢复
如果你想从检查点恢复训练,请执行以下操作:
# 从最后一个检查点恢复训练,你可以用任何其他检查点替换last.ckpt
python launch.py --config path/to/trial/dir/configs/parsed.yaml --train --gpu 0 resume=path/to/trial/dir/ckpts/last.ckpt
# 如果训练已完成,你仍可以通过设置trainer.max_steps来继续训练更长时间
python launch.py --config path/to/trial/dir/configs/parsed.yaml --train --gpu 0 resume=path/to/trial/dir/ckpts/last.ckpt trainer.max_steps=20000
# 你也可以使用恢复的检查点进行测试
python launch.py --config path/to/trial/dir/configs/parsed.yaml --test --gpu 0 resume=path/to/trial/dir/ckpts/last.ckpt
# 注意,上述命令使用了先前试验的已解析配置文件
# 这将继续使用相同的试验目录
# 如果你想保存到新的试验目录,请在命令中将parsed.yaml替换为raw.yaml

# 仅从保存的检查点加载权重,但不恢复训练(即不加载优化器状态):
python launch.py --config path/to/trial/dir/configs/parsed.yaml --train --gpu 0 system.weights=path/to/trial/dir/ckpts/last.ckpt
导出渲染视频
python launch.py --config path/to/trial/dir/configs/parsed.yaml --test --gpu 0 resume=path/to/trial/dir/ckpts/last.ckpt
导出纹理网格
从第2+3阶段获得的纹理网格
要将场景导出为纹理网格,请使用--export选项。我们目前支持导出为obj+mtl格式,或带有顶点颜色的obj格式。
# 这使用默认的mesh-exporter配置,导出obj+mtl格式
python launch.py --config "path/to/stage3/trial/dir/configs/parsed.yaml"  --export --gpu 0 resume="path/to/stage3/trial/dir/ckpts/last.ckpt"  system.exporter_type=mesh-exporter system.exporter.context_type=cuda
计划
我们致力于开源GeoDream相关材料,包括:
- 文本到3D推理代码
- 导出渲染视频
- 纹理网格提取
- 基于单视图参考图像的文本到3D
- Uni3D评分的评估代码,将语义一致性测量从2D提升到3D
- 发布我们生成结果的检查点,以帮助研究人员进行公平比较
- 测试提示词
致谢
GeoDream基于以下优秀的开源项目构建:Uni3D、ThreeStudio、MVDream、One2345、Zero123、Zero123++。
感谢这些项目的维护者对社区的贡献!
引用
如果你觉得GeoDream有帮助,请考虑引用:
@inproceedings{Ma2023GeoDream,
    title = {GeoDream: Disentangling 2D and Geometric Priors for High-Fidelity and Consistent 3D Generation},
    author = {Baorui Ma and Haoge Deng and Junsheng Zhou and Yu-Shen Liu and Tiejun Huang and Xinlong Wang},
    journal={arXiv preprint arXiv:2311.17971},
    year={2023}
}

 访问官网
访问官网 Github
 论文
论文


