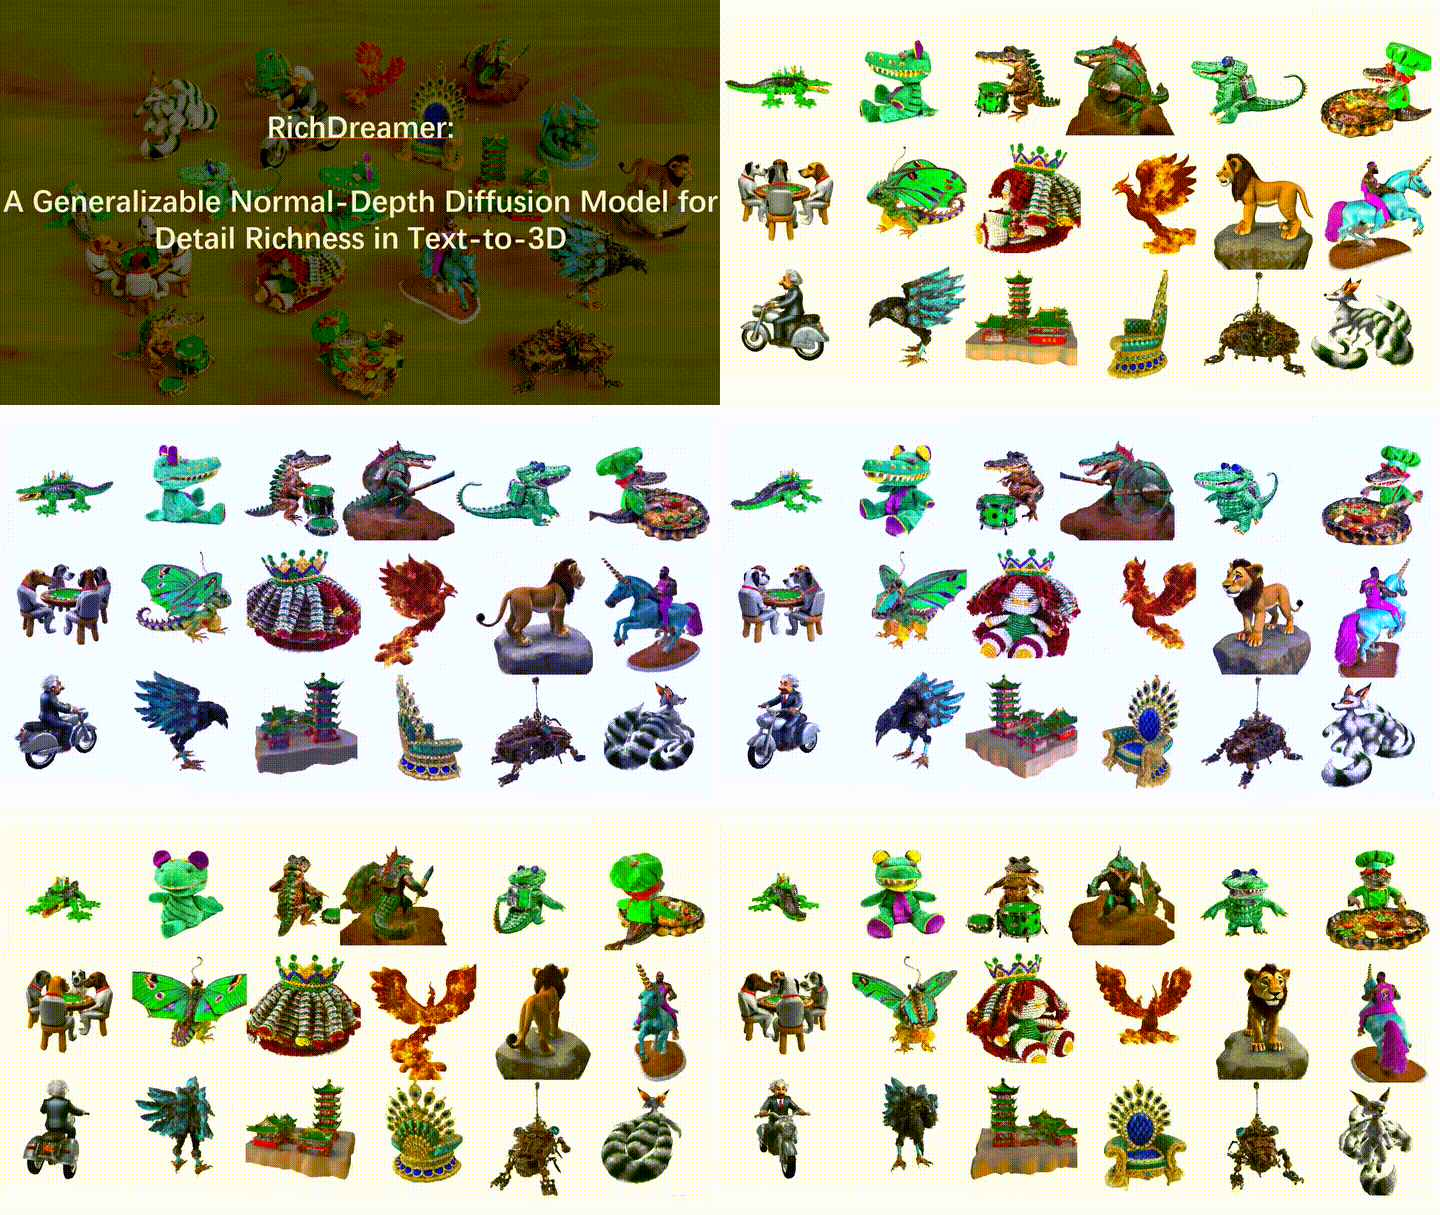
RichDreamer
RichDreamer: 一个可泛化的基于法线深度扩散模型的文本到3D细节丰富生成方法。
邱凌腾*, 陈冠英*, 顾晓东*, 左琪, 徐牧天, 吴宇爽, 袁维昊, 董子龙, 柏立峰, 韩晓光
如果您熟悉中文,可以阅读中文版本的README。
我们的方法基于法线深度扩散模型,更多详情请参考normal-depth-diffusion。
项目主页 | 论文 | YouTube视频 | ND-扩散模型 | 3D渲染数据集

待办事项 :triangular_flag_on_post:
- 文本到ND扩散模型
- 多视图ND和多视图反照率扩散模型
- 发布代码
- 在ModelScope的3D物体生成上提供生成试用
- Docker镜像
新闻
- RichDreamer被CVPR2024接收。(亮点) (2024年4月4日 UTC)
- ModelScope的3D物体生成上线。快来试试 :fire::fire::fire: (2023年12月22日 UTC)
- 发布RichDreamer :fire::fire::fire: (2023年12月11日 UTC)
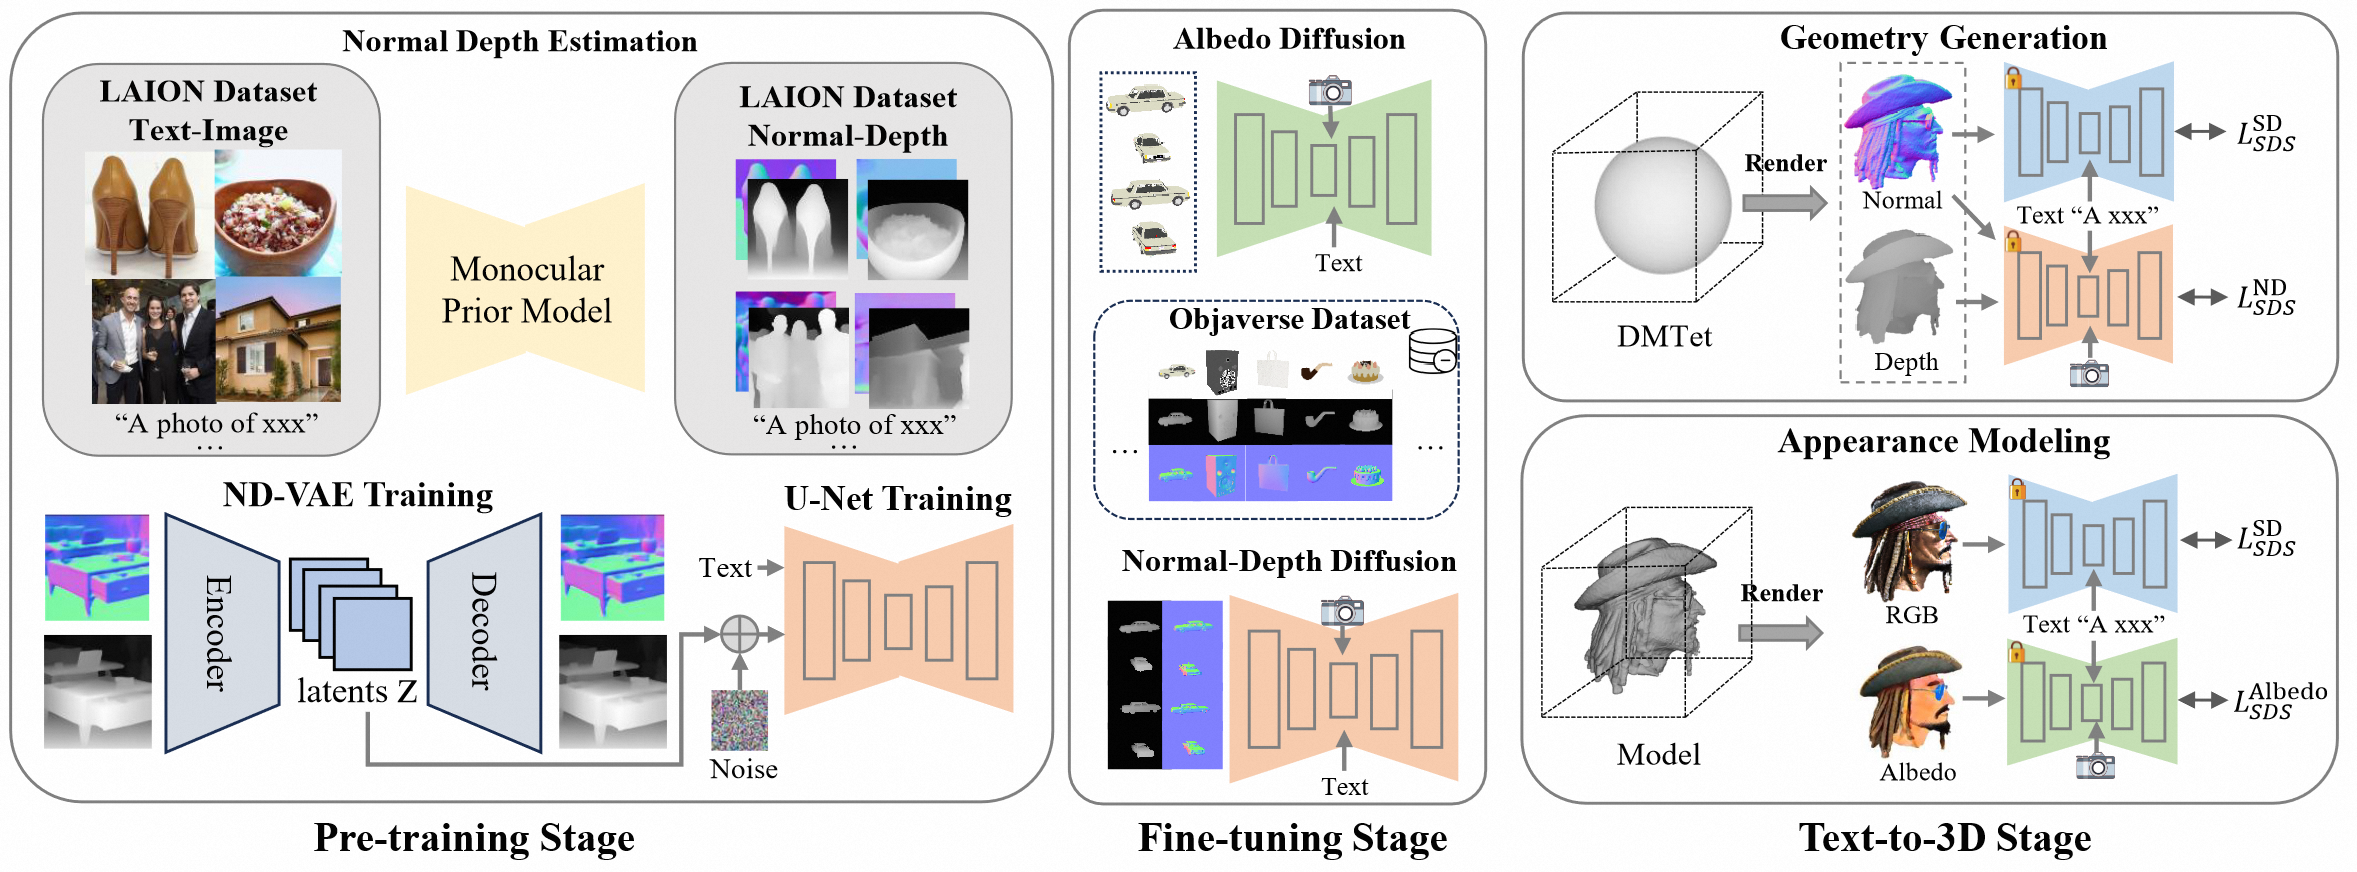
架构

安装
- 系统要求:Ubuntu20.04
- 测试过的GPU:RTX4090,A100
使用以下脚本安装依赖。
git clone https://github.com/modelscope/RichDreamer.git --recursive
conda create -n rd
conda activate rd
# 安装threestudio的依赖
pip install -r requirements_3d.txt
我们还提供了一个dockerfile来构建docker镜像,或者使用我们构建好的docker镜像。
sudo docker build -t mv3dengine_22.04:cu118 -f docker/Dockerfile .
# 或者使用我们构建好的docker镜像
sudo docker pull registry.cn-hangzhou.aliyuncs.com/ailab-public/aigc3d
下载预训练权重。
- 多视图法线深度扩散模型(ND-MV)
- 多视图深度条件反照率扩散模型(Alebdo-MV)
或者你可以使用以下脚本下载权重。
python tools/download_nd_models.py
# 复制256_tets文件用于dmtet
cp ./pretrained_models/Damo_XR_Lab/Normal-Depth-Diffusion-Model/256_tets.npz ./load/tets/
# 将你的huggingface模型链接到./pretrained_models/huggingface
cd pretrained_models && ln -s ~/.cache/huggingface ./
如果你无法访问huggingface下载SD 1.5、SD 2.1和CLIP,你可以从阿里云下载SD和CLIP模型,然后将$download_sd_clip文件放到pretrained_models/huggingface/hub/。
mkdir -p pretrained_models/huggingface/hub/
cd pretrained_models/huggingface/hub/
mv /path/to/${download_sd_clip} ./
tar -xvf ${download_sd_clip} ./
生成
确保你有以下模型。
RichDreamer
|-- pretrained_models
    |-- Damo_XR_Lab
        |-- Normal-Depth-Diffusion-Model
            |-- nd_mv_ema.ckpt
            |-- albedo_mv_ema.ckpt

    |-- huggingface
        |-- hub
            |-- models--runwayml--stable-diffusion-v1-5
            |-- models--openai--clip-vit-large-patch14
            |-- models--stabilityai--stable-diffusion-2-1-base
            |-- models--laion--CLIP-ViT-H-14-laion2B-s32B-b79K
注意我们在所有*.sh文件中运行命令之前设置了环境变量TRANSFORMERS_OFFLINE=1 DIFFUSERS_OFFLINE=1 HF_HUB_OFFLINE=1,以防止每次都连接到huggingface。
如果你使用上述脚本下载SD和CLIP模型,则无需任何操作。如果通过huggingface api下载,在首次运行时,需要在*.sh文件中设置TRANSFORMERS_OFFLINE=0 DIFFUSERS_OFFLINE=0 HF_HUB_OFFLINE=0,它将连接到hugging face并自动下载模型。
我们的(NeRF)
# 快速开始,单个A-100 80G
python3 ./run_nerf.py -t $prompt -o $output

# 从提示列表运行
# 例如 bash ./scripts/nerf/run_batch.sh 0 1 ./prompts_nerf.txt
# 我们还提供run_batch_res256.sh来使用高分辨率渲染图像进行优化,以获得更好的结果,但会消耗更多内存和时间。
bash ./scripts/nerf/run_batch.sh $start_id $end_id ${prompts_nerf.txt}

# 如果你没有A-100设备,我们提供了一个节省内存的版本来生成结果。
# 适用于单个GTX-3090/4090,24GB显存。
# 例如 bash ./scripts/nerf/run_batch_fast.sh 0 1 ./prompts_nerf.txt
# 或者 python3 ./run_nerf.py -t "a dog, 3d asset" -o ./outputs/nerf --img_res 128 --save_mem 1
bash ./scripts/nerf/run_batch_fast.sh $start_id $end_id ${prompts_nerf.txt}
# 或者使用:
python3 ./run_nerf.py -t "$prompt" -o $output --img_res 128 --save_mem 1
我们的(DMTet)
DMTet训练技巧
1. 高分辨率渲染:
我们发现直接优化高分辨率DMTet球体比NeRF方法更具挑战性。例如,Fantasia3D和SweetDreamer都需要4或8个GPU进行优化,这对大多数人来说很难获得。在实验过程中,我们观察到当我们将DMTet的渲染分辨率提高到1024时,优化变得显著更稳定。这个技巧使我们能够仅使用单个GPU从DMTet进行优化,这在之前是不可行的。
2. PBR建模:
Fantasia3D提供了三种进行PBR建模的策略。如果你不需要生成支持重新照明的模型,只是为了增强真实感,我们建议使用fantasia3d_2采样策略。否则我们建议你使用fantasia3d strategy_0和我们的depth condition albedo-sds。
# 快速开始,单个A-100 80G
python3 ./run_dmtet.py -t "$prompt" -o $output

# 从提示列表运行
# 例如 bash ./scripts/nerf/run_batch.sh 0 1 ./prompts_dmtet.txt
bash ./scripts/dmtet/run_batch.sh $start_id $end_id ${prompts_dmtet.txt}

# 如果你没有A-100设备,我们提供了一个节省内存的版本来生成结果。
# 适用于单个GTX-3090/4090,24GB显存。
# bash ./scripts/dmtet/run_batch_fast.sh 0 1 ./prompts_dmtet.txt
bash ./scripts/dmtet/run_batch_fast.sh $start_id $end_id ${prompts_dmtet.txt}
致谢
本工作基于许多令人惊叹的研究工作和开源项目:
感谢他们在3D生成领域的出色工作和巨大贡献。
我们要特别感谢陈锐在训练Fantasia3D和PBR建模方面的宝贵讨论。
此外,我们衷心感谢徐超在进行重新照明实验方面提供的帮助。
引用
@inproceedings{qiu2024richdreamer,
  title={Richdreamer: A generalizable normal-depth diffusion model for detail richness in text-to-3d},
  author={Qiu, Lingteng and Chen, Guanying and Gu, Xiaodong and Zuo, Qi and Xu, Mutian and Wu, Yushuang and Yuan, Weihao and Dong, Zilong and Bo, Liefeng and Han, Xiaoguang},
  booktitle={Proceedings of the IEEE/CVF Conference on Computer Vision and Pattern Recognition},
  pages={9914--9925},
  year={2024}
}

 访问官网
访问官网 Github
 论文
论文


