Kandinsky 2.2
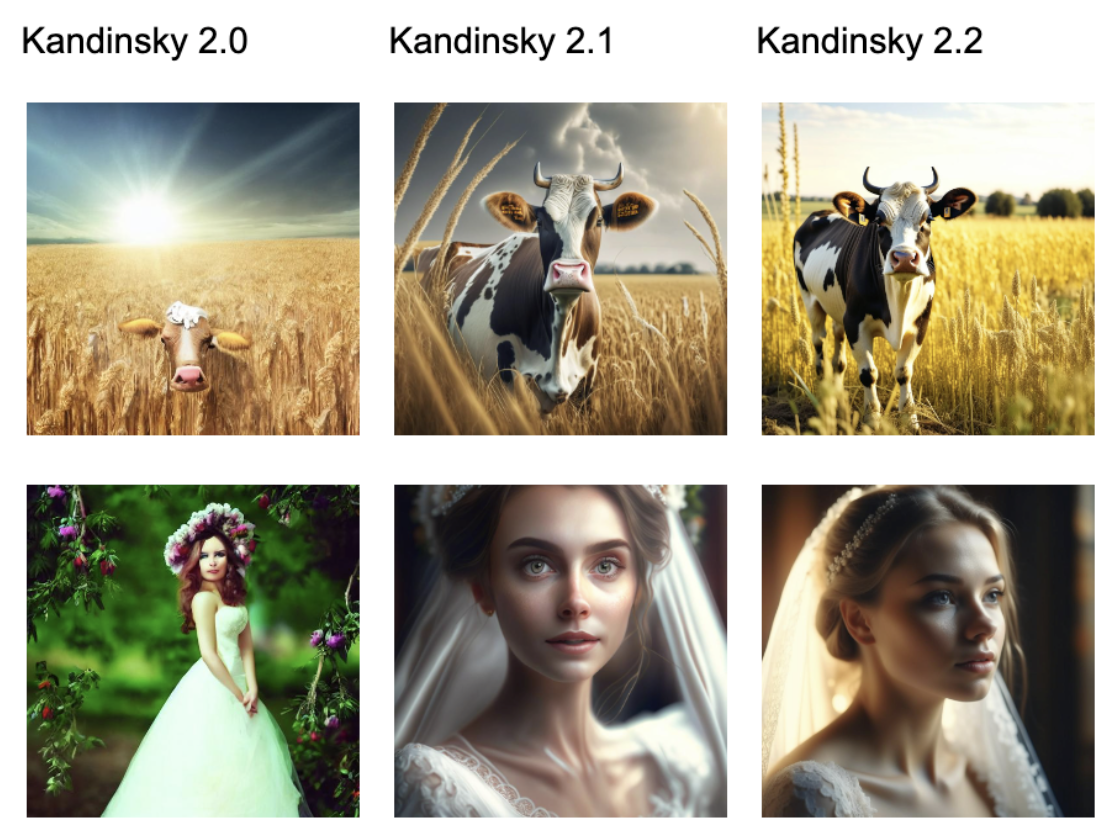
描述:
Kandinsky 2.2 在其前身 Kandinsky 2.1 的基础上进行了实质性改进,引入了新的、更强大的图像编码器 CLIP-ViT-G 并支持 ControlNet。
将图像编码器更换为 CLIP-ViT-G 显著提高了模型生成更美观图片的能力,并增强了对文本的理解,从而提升了模型的整体性能。
添加 ControlNet 机制使模型能够有效控制图像生成过程。这导致输出更准确、更具视觉吸引力,并为文本引导的图像操作开辟了新的可能性。
架构细节:
- 文本编码器 (XLM-Roberta-Large-Vit-L-14) - 560M
- 扩散图像先验 — 1B
- CLIP 图像编码器 (ViT-bigG-14-laion2B-39B-b160k) - 1.8B
- 潜在扩散 U-Net - 1.22B
- MoVQ 编码器/解码器 - 67M
检查点:
- 先验:将文本嵌入映射到图像嵌入的先验扩散模型
- 文本到图像 / 图像到图像:将图像嵌入映射到图像的解码扩散模型
- 修复:将图像嵌入和带掩码图像映射到图像的解码扩散模型
- ControlNet-深度:将图像嵌入和额外深度条件映射到图像的解码扩散模型
推理模式
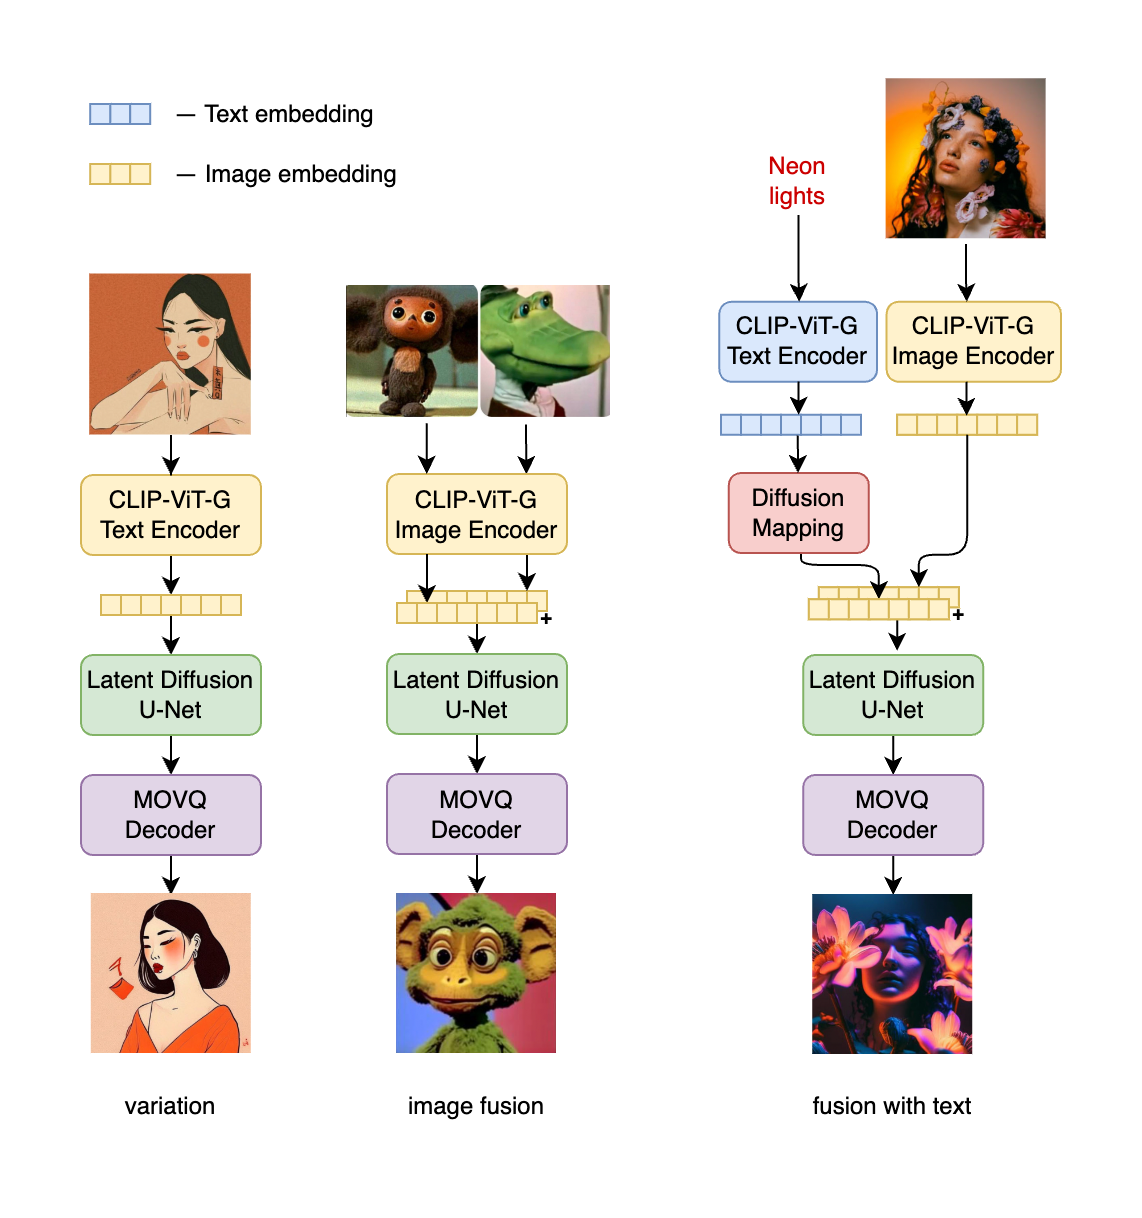
如何使用:
查看 ./notebooks 文件夹中的 Jupyter 笔记本示例
1. 文本到图像
from kandinsky2 import get_kandinsky2
model = get_kandinsky2('cuda', task_type='text2img', model_version='2.2')
images = model.generate_text2img(
    "红色猫咪,4K 照片",
    decoder_steps=50,
    batch_size=1,
    h=1024,
    w=768,
)
Kandinsky 2.1
pip install "git+https://github.com/ai-forever/Kandinsky-2.git"
模型架构:
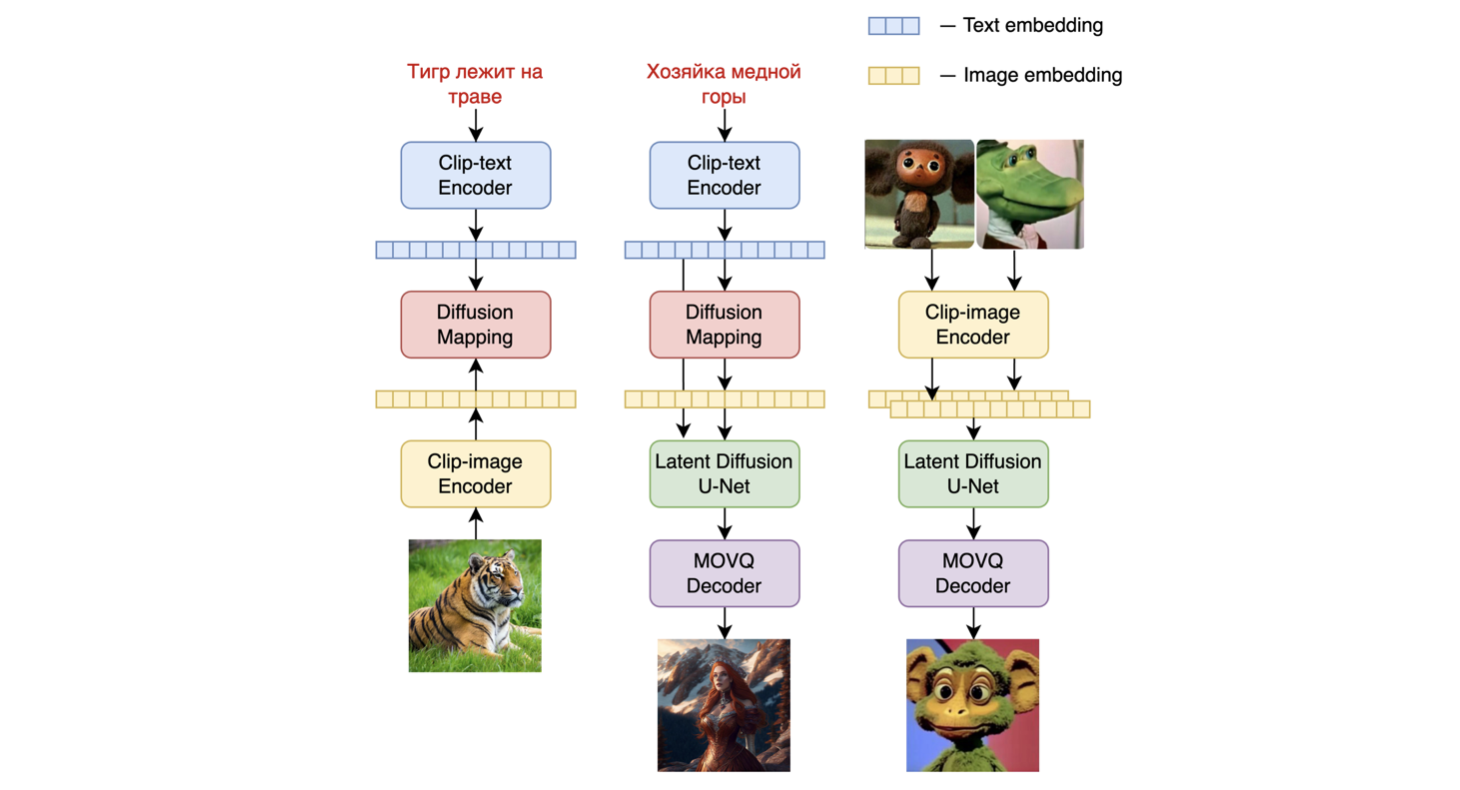
Kandinsky 2.1 继承了 Dall-E 2 和潜在扩散的最佳实践,同时引入了一些新想法。
它使用 CLIP 模型作为文本和图像编码器,并在 CLIP 模态的潜在空间之间使用扩散图像先验(映射)。这种方法提高了模型的视觉性能,并为图像混合和文本引导的图像操作开辟了新的视野。
对于潜在空间的扩散映射,我们使用了一个具有 20 层、32 个头和 2048 隐藏大小的 transformer。
其他架构部分:
- 文本编码器 (XLM-Roberta-Large-Vit-L-14) - 560M
- 扩散图像先验 — 1B
- CLIP 图像编码器 (ViT-L/14) - 427M
- 潜在扩散 U-Net - 1.22B
- MoVQ 编码器/解码器 - 67M
Kandinsky 2.1 在大规模图像-文本数据集 LAION HighRes 上进行了训练,并在我们的内部数据集上进行了微调。
如何使用:
查看 ./notebooks 文件夹中的 Jupyter 笔记本示例
1. 文本到图像
from kandinsky2 import get_kandinsky2
model = get_kandinsky2('cuda', task_type='text2img', model_version='2.1', use_flash_attention=False)
images = model.generate_text2img(
    "红色猫咪,4K 照片",
    num_steps=100,
    batch_size=1,
    guidance_scale=4,
    h=768, w=768,
    sampler='p_sampler',
    prior_cf_scale=4,
    prior_steps="5"
)

提示:"爱因斯坦在对数图周围的太空中"
2. 图像融合
from kandinsky2 import get_kandinsky2
from PIL import Image
model = get_kandinsky2('cuda', task_type='text2img', model_version='2.1', use_flash_attention=False)
images_texts = ['红色猫咪', Image.open('img1.jpg'), Image.open('img2.jpg'), '一个男人']
weights = [0.25, 0.25, 0.25, 0.25]
images = model.mix_images(
    images_texts,
    weights,
    num_steps=150,
    batch_size=1,
    guidance_scale=5,
    h=768, w=768,
    sampler='p_sampler',
    prior_cf_scale=4,
    prior_steps="5"
)
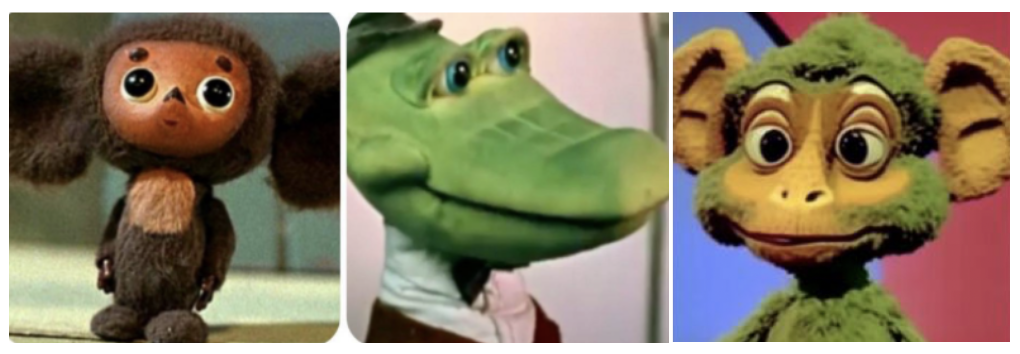
3. 图像修复
from kandinsky2 import get_kandinsky2
from PIL import Image
import numpy as np

model = get_kandinsky2('cuda', task_type='inpainting', model_version='2.1', use_flash_attention=False)
init_image = Image.open('img.jpg')
mask = np.ones((768, 768), dtype=np.float32)
mask[:,:550] =  0
images = model.generate_inpainting(
    '男人 4K 照片',
    init_image,
    mask,
    num_steps=150,
    batch_size=1,
    guidance_scale=5,
    h=768, w=768,
    sampler='p_sampler',
    prior_cf_scale=4,
    prior_steps="5"
)
Kandinsky 2.0
pip install "git+https://github.com/ai-forever/Kandinsky-2.git"
模型架构:
这是一个潜在扩散模型,配备两个多语言文本编码器:
- mCLIP-XLMR 560M 参数
- mT5-encoder-small 146M 参数
这些编码器和多语言训练数据集揭示了真正的多语言文本到图像生成体验!
Kandinsky 2.0 在一个包含 10 亿个多语言样本的大型数据集上进行训练,其中包括我们用于训练 Kandinsky 的样本。
就扩散架构而言,Kandinsky 2.0 实现了一个拥有 12 亿参数的 UNet。
Kandinsky 2.0 架构概览:

使用方法:
请查看 ./notebooks 文件夹中的 Jupyter 笔记本示例
1. 文本生成图像
from kandinsky2 import get_kandinsky2

model = get_kandinsky2('cuda', task_type='text2img')
images = model.generate_text2img('红场上的泰迪熊', batch_size=4, h=512, w=512, num_steps=75, denoised_type='dynamic_threshold', dynamic_threshold_v=99.5, sampler='ddim_sampler', ddim_eta=0.05, guidance_scale=10)
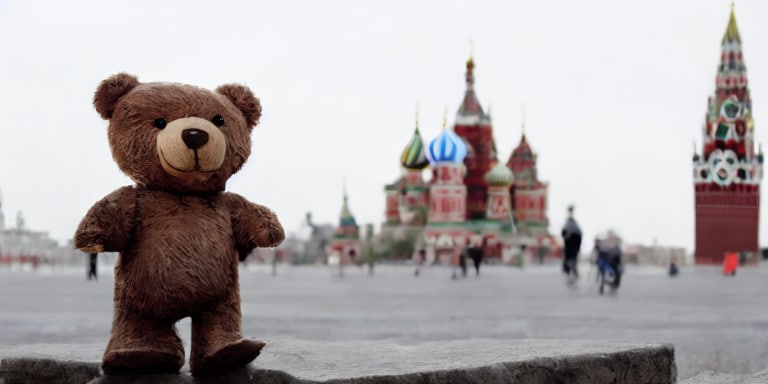
提示词:"红场上的泰迪熊"
2. 图像修复
from kandinsky2 import get_kandinsky2
from PIL import Image
import numpy as np

model = get_kandinsky2('cuda', task_type='inpainting')
init_image = Image.open('image.jpg')
mask = np.ones((512, 512), dtype=np.float32)
mask[100:] =  0
images = model.generate_inpainting('穿红裙的女孩', init_image, mask, num_steps=50, denoised_type='dynamic_threshold', dynamic_threshold_v=99.5, sampler='ddim_sampler', ddim_eta=0.05, guidance_scale=10)
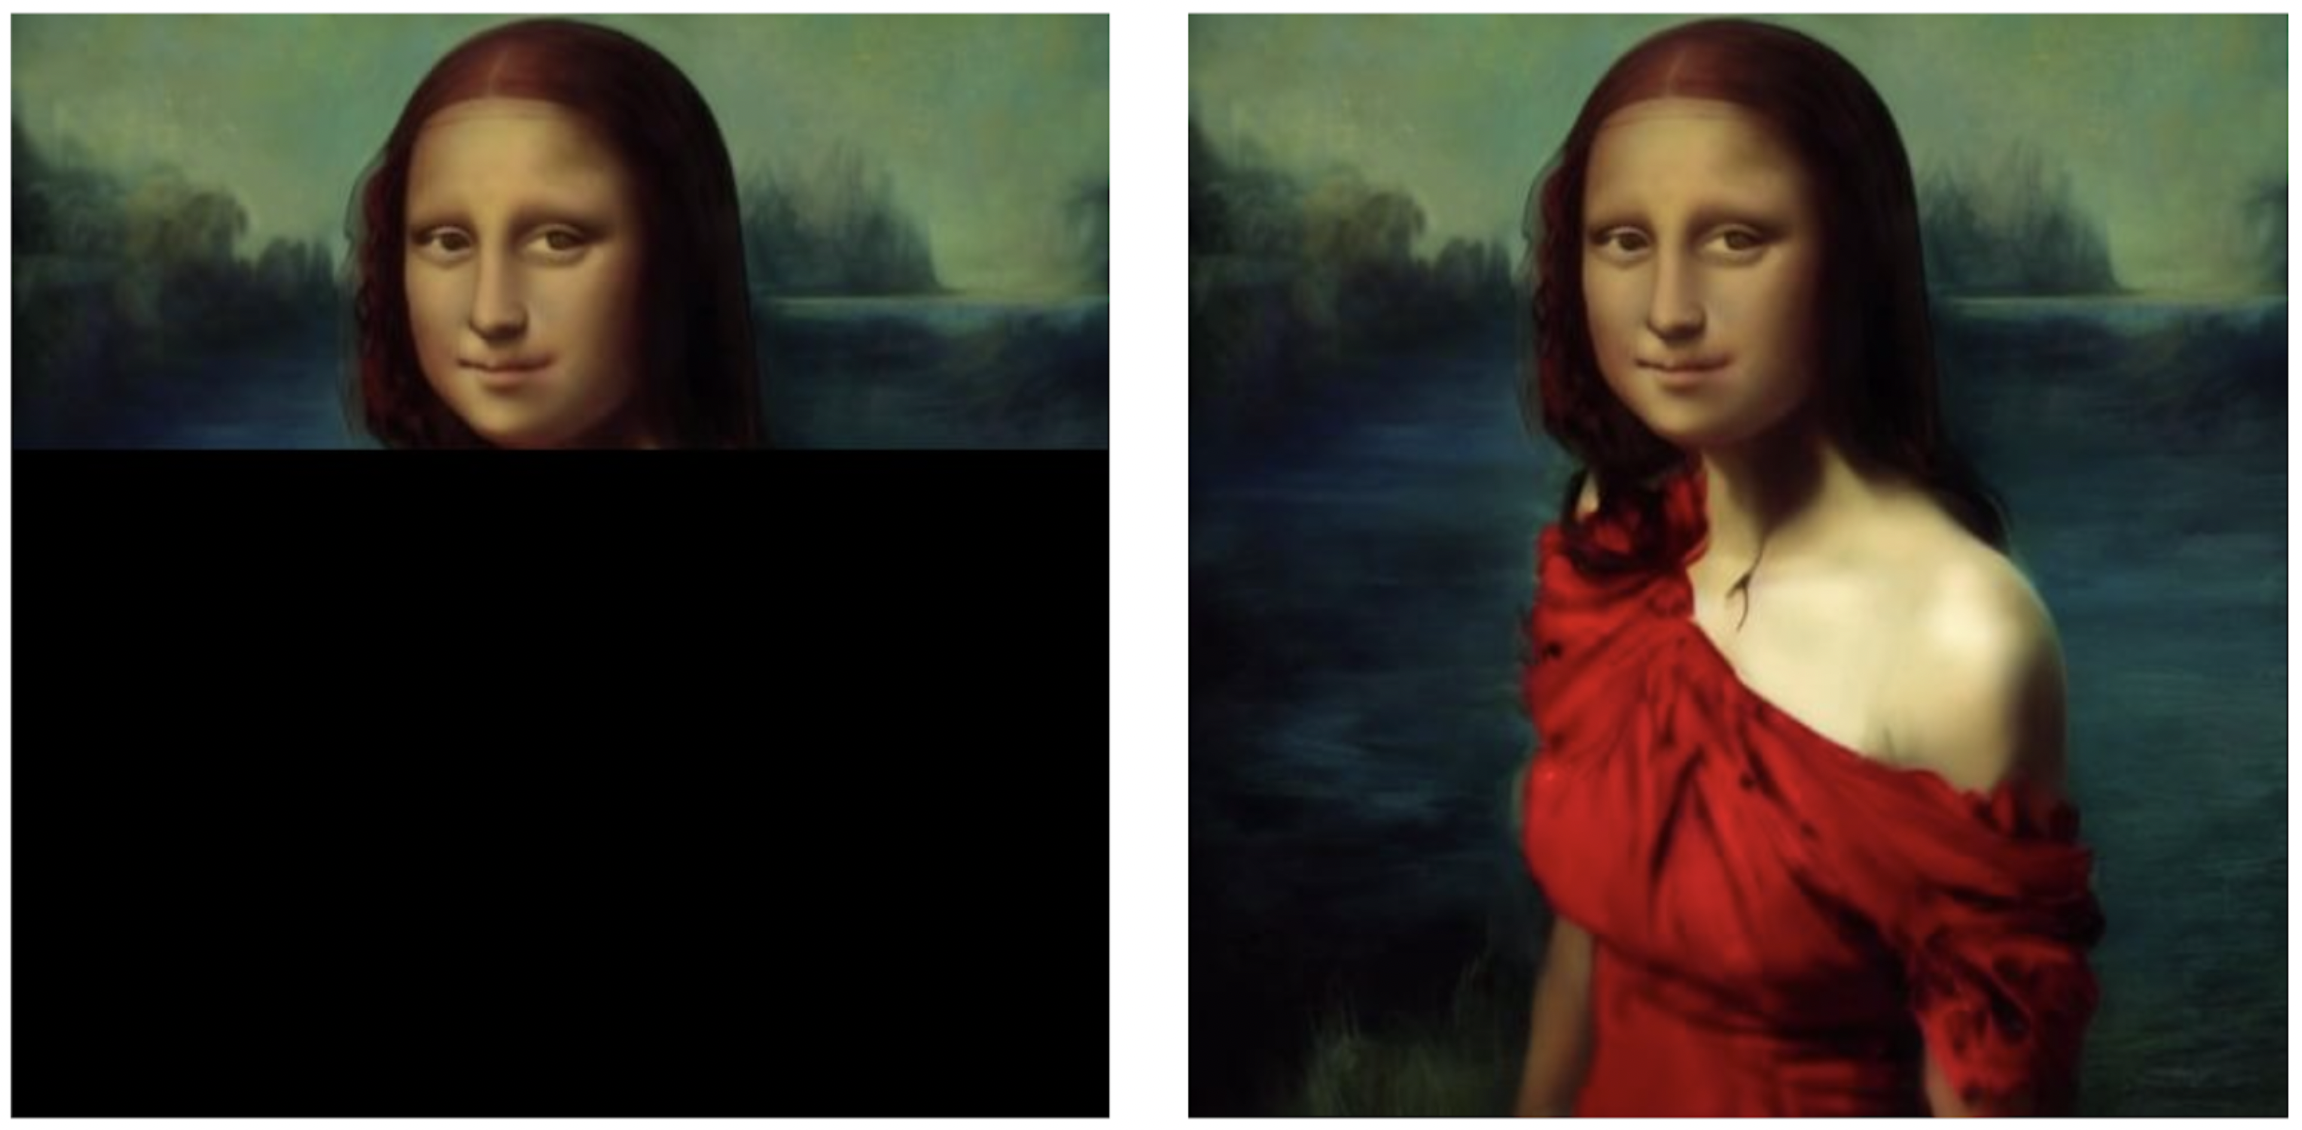
提示词:"穿红裙的女孩"
3. 图像转图像
from kandinsky2 import get_kandinsky2
from PIL import Image

model = get_kandinsky2('cuda', task_type='img2img')
init_image = Image.open('image.jpg')
images = model.generate_img2img('猫', init_image, strength=0.8, num_steps=50, denoised_type='dynamic_threshold', dynamic_threshold_v=99.5, sampler='ddim_sampler', ddim_eta=0.05, guidance_scale=10)

 Github
 Huggingface


